Showing posts with label Mint. Show all posts

Wednesday, March 16, 2016

Thin Mint Cookie Truffles

Ingredients:

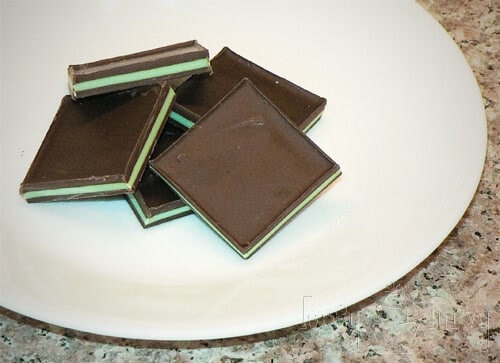
1 (9oz_ package of Girl Scout Thin Mint Cookies (or Keebler Grasshopper cookies)
1/2 package (4oz) cream cheese, softened
1 (12 oz) bag Guittard's Green Mint Chips

Directions:

1) In a food processor, pulse the Thin Mints a few times, and then blend them down until they are just crumbs. It might be easier to do this in two batches (even if you don’t have a food processor, you can still make these. Throw the cookies in a big Ziploc bag and start pounding them with a hammer until you have a lot of fine crumbs).
2) Next, mix the cream cheese and cookie crumbs together in a bowl until well-mixed. Roll the mixture into 1 inch size balls, and place them on a wax paper covered baking sheet. Place the baking sheet in the fridge for about 30 minutes, so the balls are easier to dip in the chocolate and do not fall apart.
Once the truffles have been in the fridge for a while, melt the green mint chips in a microwave-safe bowl in the microwave. Heat the chips for 30 seconds at a time, stirring in between each heat burst. Repeat until the chips are all melted.
3) Roll each ball in the melted chips until it is fully covered. I usually use two forks to push the truffle around until it is all covered. Then, using the two forks, carefully pick up the truffle and allow the excess mint chocolate to run off before placing back on the wax paper. Repeat with all the truffles.
4) Stick the truffles back in the fridge for a couple of minutes or until the mint chocolate is hardened.
5) If you want to decorate your truffles as I did, melt about 1/2 cup of white chocolate chips (or almond bark or white candy coating-whatever you want) the same way that you melted the mint chips. Spoon the white chocolate in a small Ziplock bag and cut a tiny bit of one corner off the bag. Start small at first, then if you need, make the hole a little larger. Drizzle the white chocolate over the green truffles.
6) Place back in the fridge until you are ready to devour eat them.
*If you can’t find those green mint chips, these can be made with almond bark or vanilla candy coating. It would also be cute to set aside small amount of cookie crumbs and sprinkle them on top of the truffles. Sprinkles also look cute on these too!

Tuesday, November 19, 2013

Candy Cane Cookies

Ingredients:
  • 1 cup butter
  • 1 cup sifted confectioners' sugar
  • 1 egg
  • 1 1/2 teaspoons almond extract
  • 1 teaspoon vanilla extract
  • 2 1/2 cups all-purpose flour
  • 1 teaspoon salt
  • 1/2 cup crushed peppermint hard candies
  • 1/2 cup white sugar
Directions:


  • Preheat oven to 375 degrees F
  • In a large bowl, combine butter, confectioners' sugar, egg, almond extract and vanilla extract. beat until smooth. Mix in flour and salt.
  • Roll into 4 inch strips, place on baking sheet. (Dough may be divided in half and colored with 1/2 teaspoon red food coloring, if desired. Roll each color into strips, place side by side, press together lightly and twist like a rope.) Curve top down to form handle of cane.
  • Bake in preheated oven for 9 to 10 minutes. While still warm, remove from pan and sprinkle with candy and sugar mixture.

  • Monday, October 14, 2013

    Andes Marbles Brownies

    Ingredients:


    Directions:

    1. Prepare brownies.
    2. Immediately place Andes Candies on surface of hot brownies. Allow to stand 2 to 3 minutes or until candies are melted.
    3. Using knife, gently swirl together melted candies to cove the entire surface of brownies. Cool 2 hours or until slightly set.


    Homemade Andes Mints

    Ingredients:


    Jelly Roll pan
    wax paper

    3 oven safe bowls 
    10-11 oz chocolate
    10-11 oz vanilla candy melts/white chocolate chips
    10-11 oz chocolate
    candy oil (peppermint) 


    Directions:

    1. Cut the wax paper to fit the length of the pan as well as come up the sides a bit, but you DON’T want them to come up the sides too far of it will fold over and fall into the chocolate.   Don’t want the wax paper moving around so you want to take some of the melted chocolate in each corner to hold the wax paper in place.  Make sure your wax paper is pulled tight across, we don’t want any bubbles, bumps or wrinkles in the paper, it will show in the chocolate.
    2. Melting the Chocolate:  Get 3 oven safe bowls.  Put the chocolate for each layer in a different bowl.  Put them all in the oven on Warm for 20 mins.  Then turn off the oven and pull out the first layer (leave the other two bowls in the oven to keep warm).  Stir it until smooth and add your flavoring. (Make sure to use candy flavoring, NOT extracts)  You can add the same flavor to every layer or mix and match different flavors.  I did one layer in almond and the other two as peppermint. About 7 drops for each layer, to taste.
    3. QUICKLY, so chocolate is still warm when you're done, spread the chocolate into the pan.  Don’t want to overwork the chocolate (can start on the outer edges working in a circle then spreading into the center.)
    4. To smooth it out,  grab the side and shake/knock it on the table.  After a bit of shaking/knocking the chocolate will smooth itself out.
    5. In a few min what the layer goes from glossy to matte it's time to pour the next layer. (Pour to soon you’ll risk mixing the layers together, wait too long the layers won’t stick together)
    6. Take the colored candy melts (white chocolate) out of the oven, add the candy oils (7 drops)  and stir it together. Spread it over the chocolate layer.
    7. Shake/knock it smooth and let it cool until it’s also matte.
    8. Add the last layer of chocolate the same way.
    9. Once it’s matte, cut the rest into 2 1/4 inch squares.


    http://www.imtopsyturvy.com/homemade-andes-mints-this-weeks-treat/

    Sunday, April 28, 2013

    Betty Crocker Chocolate Mint Brownies

    Brownie Base
    1 box Betty Crocker® Original Supreme Premium brownie mix
    Water, vegetable oil and egg called for on brownie mix box

    Filling:
    2 1/2 cups powdered sugar
    3 tbs butter or margarine, softened
    3 tbs whipping cream
    2 oz cream cheese, softened
    1/8 to 1/4 teaspoon mint extract
    2 drops green food colour

    Topping:
    1/3 cup whipping cream
    1 1/3 cups (8 oz) semisweet chocolate chips
    1/3cup butter (do not use margarine)

    1 Heat oven to 350°F (325°F for dark or nonstick pan). Grease bottom only of 9-inch square pan with shortening or cooking spray. (For easier cutting, line pan with foil, then grease foil on bottom only of pan.) Make and bake brownie mix as directed on box. Cool completely, about 1 1/2 hours.

    2 In large bowl, beat filling ingredients with electric mixer on medium speed until smooth. Spread over cooled brownies. Refrigerate about 1 hour or until set.

    3 Meanwhile, in 2-quart nonstick saucepan, heat topping ingredients over medium-low heat, stirring constantly, until melted and smooth. Cool about 10 minutes or until lukewarm.

    4 Pour topping over filling; spread to cover. Refrigerate uncovered about 2 hours or until set. Before cutting into bars, let stand 10 minutes at room temperature. Store covered in refrigerator.


    http://www.bettycrocker.com/recipes/chocolate-mint-brownies/39ae52eb-e13f-407c-aeda-6e234de14751